If you’re finding yourself pivoting to online events in the wake of the COVID-19 quarantine, you may be feeling nervous about how to get it right. Even if online events or educational webinars were something you had been planning on trying for a while, the current need for quick turnarounds and continued cash flow can be daunting.
Regardless of your motivation, the shift from in-person experiences to virtual webinars is a learning curve. For instance, even if your circus arts school or yoga studio has always had a busy roster of classes, you can’t simply conduct the exact same classes on camera with no further considerations or prep.
We know you have concerns, so take a deep breath, run through the checklist below, and remember that every event, online or not, is a learning experience.
Outline the online experience you’re going to present
First, strategise the best way to present your offering to participants at home.
Some things to think through:
- Exact subject matter: Think about how you can modify your subject matter for the current constraints. For example, you might need to swap out aerial acrobatics for moves your participants can pull off in their bedrooms.
- The best presenter: Keep in mind that traditional webinar best practice is to use two or more presenters. It keeps the conversation lively. But if your virtual event is a class, exercise session, craft workshop, or something else more “hands on,” one presenter works fine. If you have multiple teachers or presenters available, be sure they’re comfortable on camera.
- A script: It might seem more dynamic to wing it, but having at least a framework for your webinar will keep you focused and in the zone.
- Audience interactivity: Throughout the span of the broadcast, you may want to interact with your audience with things like live polls and Q+As. You can designate a co-host for this to make it easier to stay focused. This person can also proactively share important links, resources, and ideas as you go along.
- The timing: Keep in mind that attendees might be tuning in from different time zones. Choose a time that will ideally work for a range of people.
- The environment: Find the right space in which to record the webinar. A room with natural light and a blank, uncluttered wall are often best.
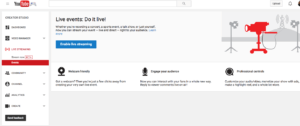
Choose the right conferencing or live streaming technology
Technology set up is often the step that throws new online event creators for a loop. There are plenty of event-streaming platforms, including Facebook Live, Instagram Live, Zoom, WebEx, and GoToMeeting. The one you choose will depend on two things:
- The type of live event you’re streaming
- How much you charge to attend
If you already have a cult following on Facebook and your event is a free performance that attendees can passively watch, then Facebook Live might make the most sense. Viewers can comment in real-time, lending a sense of community participation. But if you want viewers to be able to see each other and even interact, you’ll need to use a platform like Zoom that allows multiple attendees to participate more directly.
Want to monetise your webinar? Then you’ll want to choose a technology that integrates with a ticketing platform. Eventbrite, for instance, integrates with Zoom, allowing you to share the meeting link with those who purchased a ticket or registration. Learn more about the integration in this article.
Create a registration page for your online event
It’s essential that your registration page makes it clear how attendees can access your online event. Some streaming platforms have native registration pages.
Don’t forget to check with your current ticket platform: They may have built-in all the tools you need to promote your webinar and sign up participants in advance. With Eventbrite, for instance, you can easily monetise your webinar or create a free online-only event.
Test your technology before you go live
A hundred people are ready and raring to go, tuned in to see your first ever online event. But your video won’t boot up and your microphone won’t connect.
This is the new “naked in class” nightmare for a lot of event providers. To avoid it becoming a reality, test everything in advance. It goes without saying that you need a computer with a decent microphone and video camera. You also need a strong, consistent internet connection to live stream.
You may even want to run through a practice session of your webinar. Try recording it and playing it back to critique your “performance” so you can perfect it live.
Pro tip: If you’re unsure of your internet strength, consider bypassing Wi-Fi and plugging an ethernet cable directly into your laptop.
Invite your audience to join you online
Just like you would for any event, you need a tactical promotional plan for your online events. Start by inviting everyone in the ways you always have for in-person events: email newsletters, social media, website updates.
Here’s an example:

For live online events, though, there’s an extra step you should take: Send out a reminder before the event is due to start. When setting up an online event on Eventbrite, attendees will automatically receive reminders with a link to your Online Events page 48 hours before the event, 2 hours before the event, and when the event starts.
Note: Online Event page is only available for events using the new event creation experience. If you haven’t switched over yet, now is a good time.
In your communication, make it clear that this is an online event and that anyone is welcome. If you’re charging for the event, make that information explicit as well.
Run the webinar
Starting and ending on time is critical to live online events. Things may be a little looser at your acrobatics studio, but online it’s important to meet people’s expectations. For one thing, it’s just respectful of their time. But if online participation is a new paradigm for audience members, starting and ending on time will help anchor them in the process. If they show up at the start time and you’re not there, they might get confused and bail.
Don’t forget to follow up with your viewers!
It’s best practice for almost any kind of event, and webinars are no exception. Send a post-webinar survey right away to collect feedback while the experience is fresh in participants’ minds. Here’s an example:

If you mentioned follow-up materials during your webinar, make sure to follow through with sending these within 24 hours. The email might look something like this:

Click here to see an example of the Online Events page this email links to.
For some types of events, you’ll record the webinar so that people who could not attend in person can watch later on. Sending the link to the recording shortly after the live event is critical.
Pro tip: Always debrief with your team to suss out what went wrong, what went right, and how you can learn from each live event.
Ready to get live — online?
If you’re new to live-streaming or running webinars, there’s going to be a learning curve. But online events are going to be critical moving forward to keep event creators afloat. Now is the best time to pressure-test those online event ideas you put on the back burner — your community may thank you for it.
You can find more tips on getting the most out of a virtual transition by reading “How to Host an Online Event or Webinar That Live Event Attendees Will Love“.