If you have an online event page, you’ll probably be able to customise your page’s URL.
Why customise your URL? Customisation gives you a short, memorable URL for your marketing materials and your automatically-generated URL might not fit the bill.
Say you’re hosting a 2016 summer party. If you’re hosting it on Eventbrite, you’ll have an auto-generated URL like ‘https://www.eventbrite.com/e/summer-party-2016-tickets-26784599458.’ Why not simplify it to ‘EventbriteSummerParty2016’?
This revised URL is descriptive, but more importantly, it’s memorable.
If you’ll be sharing your event URL on different marketing materials, people will be able to see the URL and remember it right away. If the URL is too long, people may forget what it is — and then may never remember to find your event and buy a ticket.
For social media posts, a short event URL will keep your post succinct, give it a direct call to action, and allow people to see exactly where they’ll be sent when they click on the link (something a URL shortener won’t necessarily do).
How to customise your event URL on Eventbrite
So how do you go about changing your event URL?
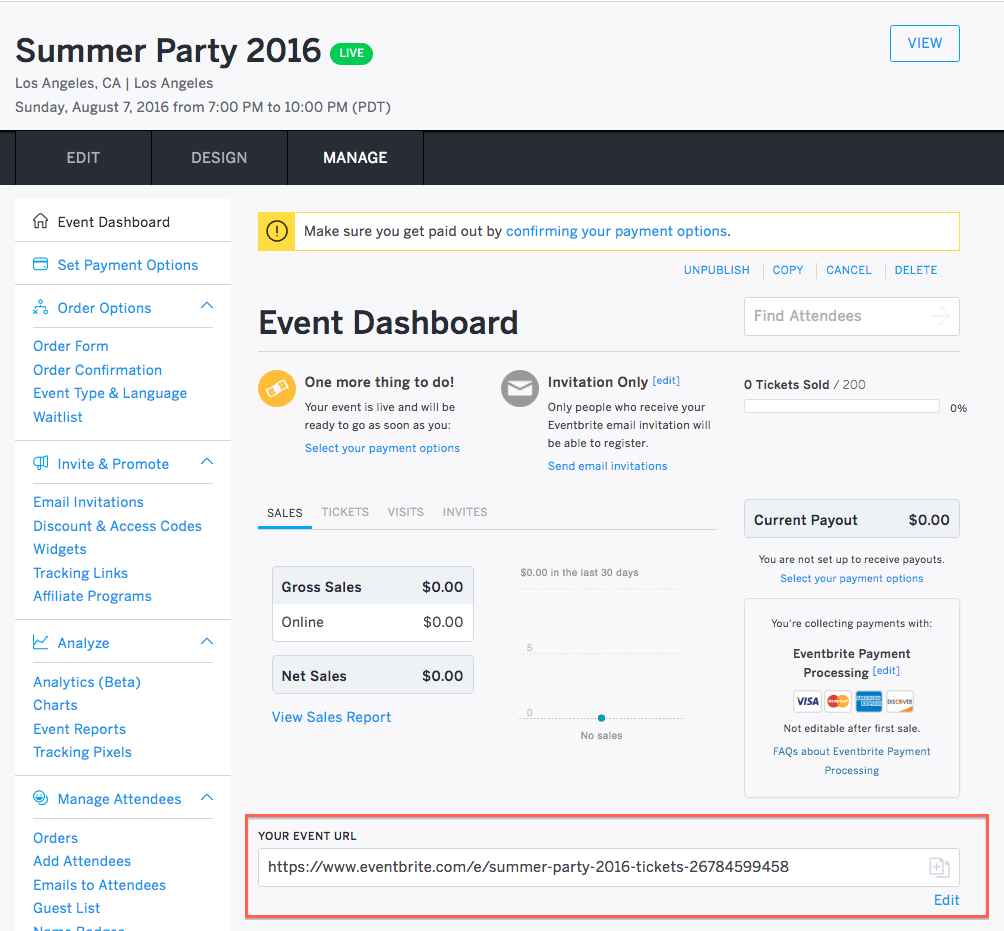
Head to your event’s ‘Manage’ page and scroll down to ‘Your Event URL’ in the Event Dashboard section.
Your event URL is located in the middle of the Event Dashboard. Select ‘Edit’ to amend your URL.

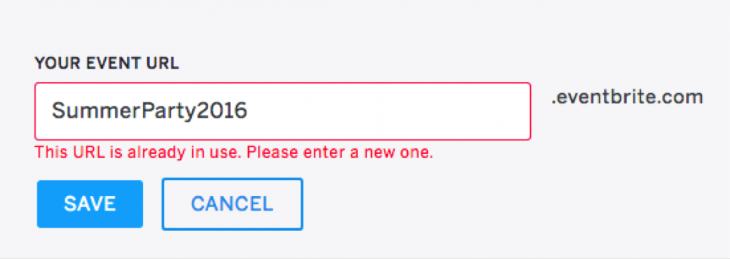
Choose something short and related to your event to help promote your event and strengthen your brand. Using our Summer Party example:

Note that if your URL is already in use, you will need to choose another. The system will alert you if this is the case:

Once saved, use your URL everywhere you promote your event. Add it to your social media posts, email campaigns, flyers etc. Remember, keep the event URL short and to-the-point so that it’s memorable and — sharable! For more information and step-by-step instructions, check out our help page here.
Ready for more tips on setting up a compelling event page? Check out this post on how to craft an event page that turns page visitors into ticket buyers.


